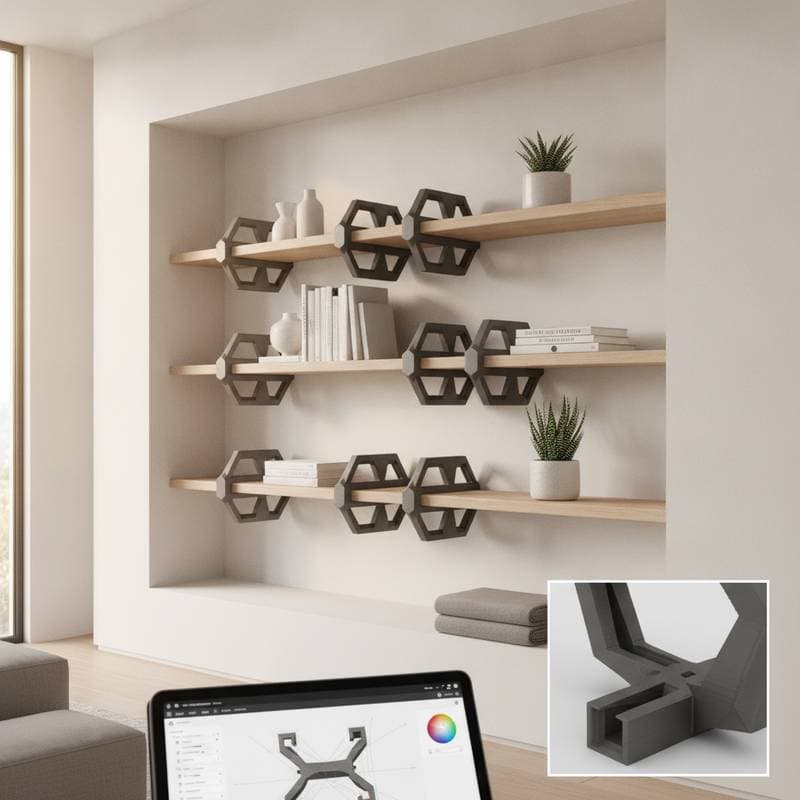
3D-Printed Brackets Revolutionize Modular Shelving
A single set of modular shelves can cost anywhere from $250 to $1,200, depending on materials and size. The brackets alone often drive up the price, especially for a custom configuration. With 3D printing, that cost can fall by half while expanding design options. Users can print custom brackets that fit a space perfectly, test new layouts, and rebuild as needs change.
At a Glance
- Average cost per shelf unit: $250 to $1,200
- 3D-printed bracket cost: $2 to $8 each
- Time to print one set: 3 to 5 hours
- Skill level: Moderate DIY or designer
Why 3D Printing Fits Modular Shelving
Modular shelving thrives on flexibility. Each bracket defines the geometry, weight capacity, and look of the system. Traditional metal or wood brackets limit shape and spacing. With 3D-printed brackets, every dimension can be controlled through parametric design, which uses variable inputs like shelf thickness or wall spacing to generate perfectly matched parts.
A designer using open-source software such as Fusion 360 or Rhino can adjust one parameter and regenerate an entire bracket set. This method reduces waste and speeds up iteration. Different load-bearing arms or decorative curves can be tested without retooling or outsourcing.
3D printing also supports material diversity. PLA plastic works for light-duty shelving in offices or studios. PETG or carbon fiber-reinforced filaments handle heavier loads in workshops or garages. By matching filament type to function, performance can be fine-tuned while keeping material costs between $25 and $60 per kilogram.
Start with a standard parametric bracket model from an online repository. Adjust the shelf width, print a small section, and test fit before producing the full set.
What to Expect in Design and Printing
Designing a bracket begins with defining the shelf span and expected load. A typical 24-inch shelf carrying 40 pounds requires a bracket with around 1.5-inch thickness at the joint and 25 percent infill for strength. Increasing infill adds rigidity but also increases print time and filament cost.
The process follows these steps:
- Set parameters for shelf thickness, wall distance, and desired angle.
- Generate the model in a parametric CAD program.
- Slice the file in a printer utility, selecting layer height around 0.2 millimeters for balance between speed and detail.
- Print and test-fit a single bracket before batch printing.
- Sand or finish edges for smoothness and assemble with screws or anchors rated for wall type.
For accuracy, use a caliper to confirm tolerances. Even slight variations can affect alignment across multiple shelves. 3D printers with at least 0.1-millimeter precision provide the best results for repeatable parts.
Keep one digital template for each wall system. Label files with wall type and shelf depth to simplify future replacements.
Costs and Budget
3D printing shifts costs from materials to time. A set of four brackets for a small wall unit may cost $20 to $35 in filament and about $5 in energy. Commercial metal brackets of similar strength can reach $80 to $120 per set. The savings grow as projects scale up or designs are modified.
Price factors include printer size and speed, filament quality, finishing steps, and error rate. Larger beds save time for batch runs. Premium composites resist cracking but cost more. Painting or sealing adds both durability and expense. Failed prints can waste 10 to 20 percent of material if calibration is off.
Trim costs by grouping prints overnight and using recycled filament for prototypes. Avoid cutting corners on wall anchors, since failure there can damage both shelves and walls.
Track every print material usage and time. Use those numbers to estimate cost per bracket and refine pricing for future projects.
DIY or Professional
3D printing brackets fits the confident DIYer who already owns or has access to a printer. If new to parametric design, expect a learning curve of 10 to 15 hours before reliable parts are produced. A professional designer or fabrication shop can deliver ready-to-install sets for $12 to $25 per bracket, depending on complexity.
DIY is smart when a printer and basic CAD experience are already available, unique layouts need prototyping, or quick replacements and small adjustments are required. Hire a pro when shelves support heavy loads or span long distances, commercial-grade materials or building standards compliance are needed, or a polished finish is required for retail or client-facing spaces.
Before hiring, confirm the designer experience with parametric models and structural testing. Ask for sample prints and previous performance data.
If multiple installations are planned, consider a hybrid approach. Hire a designer for the initial model, then print future sets in-house.
Common Mistakes
Several pitfalls can undermine otherwise solid designs. Ignoring wall conditions is one issue, since drywall anchors may not hold heavy loads. Use stud mounts or toggle bolts rated for the shelf weight. Overlooking filament limits is another, as PLA softens near heat sources. Switch to PETG or nylon for kitchens or workshops.
Poor calibration leads to skipped layers or under-extrusion that reduce bracket strength. Regularly level the print bed and check nozzle temperature. No test fitting allows even a millimeter error to compound over multiple shelves. Always fit the first bracket before mass printing.
Keep a small checklist by the printer. Include bed leveling, filament type, and temperature range to prevent repeat errors.
Adapting Shelves Over Time
Once installed, 3D-printed brackets make rearranging space simple. New connectors can be reprinted for different shelf angles or colors swapped for seasonal displays. Maintenance is minimal. Dust occasionally and check screw tightness every few months.