Upgrade to Ribbed Wood Ceilings: A Smarter Alternative to Coffers
Ribbed wood ceilings gain popularity in living rooms, kitchens, and home studios nationwide. These designs deliver texture, warmth, and acoustic benefits without the weight or expense associated with coffered ceilings. Installation costs range from $6 to $12 per square foot, positioning ribbed ceilings as an economical choice for adding architectural interest. Individuals with fundamental carpentry abilities and attention to alignment can complete this project independently.
Reasons for the Rise of Ribbed Ceilings
Coffered ceilings convey grandeur through intricate framing and precise layouts. In contrast, ribbed wood ceilings, also known as wood slat ceilings, employ slender wood strips affixed over furring strips or directly to drywall. This approach yields a lightweight, contemporary appearance with notable sound absorption properties.
Professionals favor ribbed ceilings for multiple advantages.
- Compatibility with rustic and minimalist aesthetics.
- Concealment of minor ceiling imperfections with minimal reduction in room height.
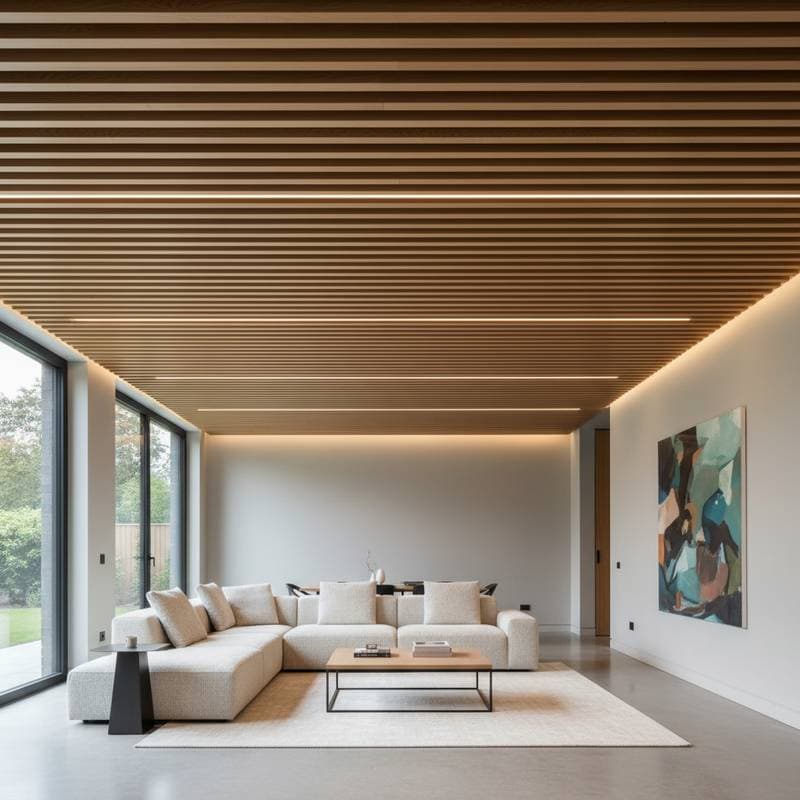
- Opportunities to incorporate lighting fixtures or conceal vents within the slats.
Ribbed ceilings harmonize seamlessly with wooden flooring or cabinetry, emphasizing natural elements. Their straightforward lines suit residential homes, creative studios, or commercial retail environments seeking subtle warmth over elaborate decoration.
Consider the desired level of texture at the outset. Wider gaps between slats create a relaxed atmosphere, whereas narrower spacing imparts a more polished finish.
Installation Overview
Plan for two full weekends to install a ribbed ceiling in a 12-by-12-foot space as a DIY endeavor. A professional installer typically finishes the work in two to three days. Essential tools include a brad nailer, level, stud finder, miter saw, and stable ladder. Protect eyes and ears during the process, and verify that the existing ceiling structure supports the additional weight of the materials.
Proceed through these steps methodically:
- Identify joist locations using a stud finder and mark their positions clearly.
- Secure furring strips perpendicular to the joists at 16-inch intervals for stable support.
- Measure and cut wood slats to fit the room dimensions, then sand all edges for smoothness.
- Apply stain or sealant to the slats prior to mounting to ensure uniform coloration.
- Position and nail the slats into place, employing spacers to maintain even gaps throughout.
- Install trim pieces along the perimeter walls to achieve a seamless, professional edge.
Upon completion, observe improvements in room acoustics and an overall warmer ambiance.
Budgeting for Materials and Labor
Expenses vary based on wood type and surface treatment.
- Pine or fir options: $6 to $8 per square foot for materials and installation.
- Oak or walnut selections: $10 to $14 per square foot for materials and installation.
- Engineered wood panels: $5 to $9 per square foot for materials and installation.
Allocate approximately $1.50 per square foot for finishing supplies like stain and polyurethane. Professional labor adds $2 to $4 per square foot, depending on project complexity.
Reduce costs by applying finishes personally, renting equipment from nearby suppliers, and purchasing lumber in volume. Prioritize quality in sealants and spacing aids, as irregularities in gaps become evident quickly.
Deciding Between DIY and Professional Installation
Those experienced with accurate measurements and elevated work can manage the installation solo. DIY participants benefit from allocating additional time for planning and detailing. Engage a professional for ceilings featuring integrated lights, ventilation systems, or irregular structures.
When selecting a contractor:
- Review references and examine images of prior ribbed or slat ceiling projects.
- Confirm possession of liability insurance and any necessary local licensing.
- Obtain a detailed, fixed-price quote encompassing materials, labor, and site cleanup.
Avoiding Installation Pitfalls
Pre-finishing the wood prevents uneven staining after mounting. Opt for finish nails over drywall varieties to minimize splitting in slender slats. Account for wood expansion by incorporating 1/4-inch gaps at the edges, accommodating humidity fluctuations.
Enhancing Daily Spaces with Ribbed Ceilings
Ribbed ceilings alter how sound and light interact within a room, fostering a more inviting environment. Routine upkeep involves dusting the slats periodically and cleaning with a moist cloth as needed.
Select pine for an informal studio setting or walnut for an elegant dining area. This design choice demands careful preparation and execution, resulting in a custom-crafted ceiling that elevates everyday experiences.