DIY Zellige Inlays: Infuse Cabinets with Moroccan Artistry
Kitchen cabinets provide essential storage, yet they often lack visual appeal. DIY Zellige inlays offer a solution. These handmade Moroccan tiles, prized for their uneven surfaces and glossy finishes, elevate basic cabinetry to artistic levels. Expect to invest between $150 and $600 per cabinet section, based on tile choices and supplies. Confident DIY enthusiasts who appreciate intricate tasks can complete the work over one to three weekends.
The Appeal of Zellige Inlays on Cabinets
Moroccan Zellige tiles trace their origins to centuries of tradition. Artisans shape each small zillij from clay, fire it, and apply an irregular glaze that produces a captivating shimmer. Inlaid into cabinet surfaces, the tiles create intricate patterns and add dimension unmatched by factory-made elements.
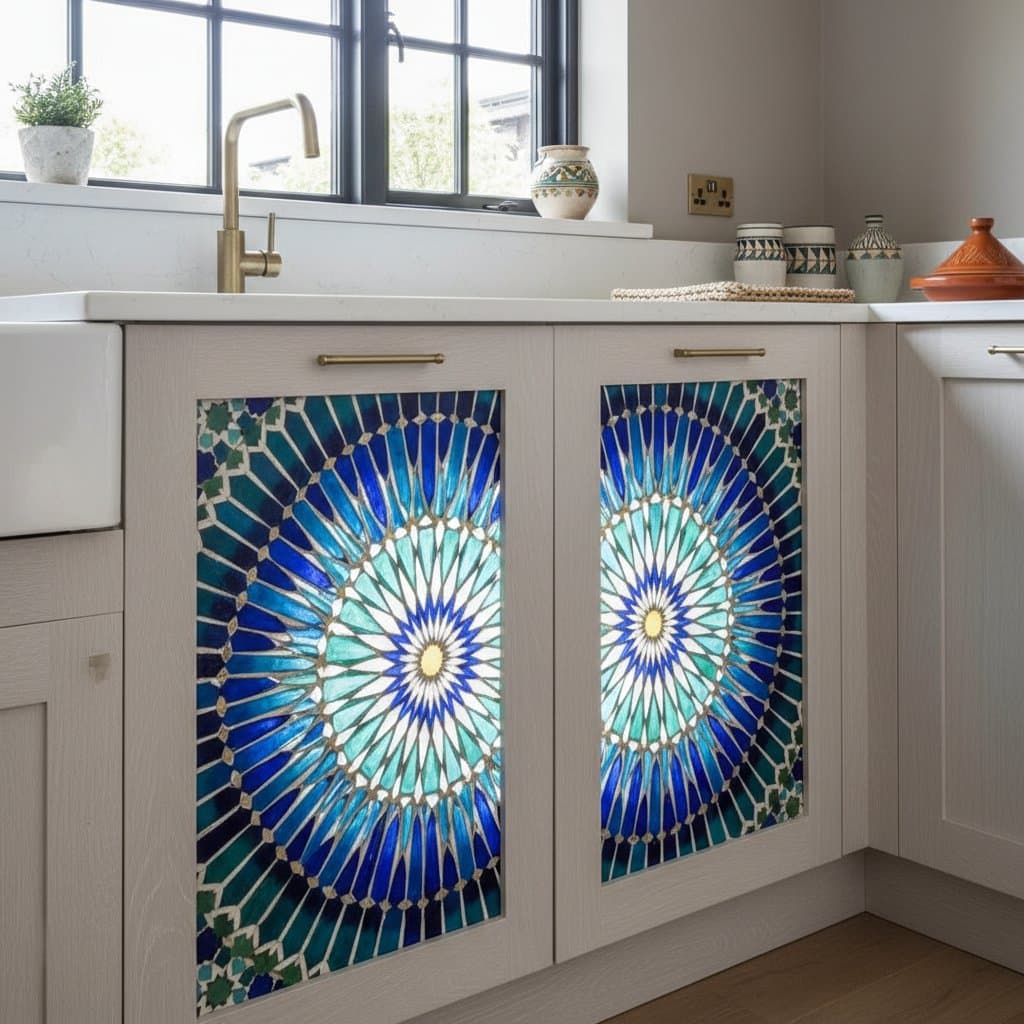
A geometric Zellige design on one cabinet face shifts with daylight, introducing dynamic energy to the space. The tiles' natural variations highlight skilled handwork over mechanical uniformity. Pair them with neutral wood tones and select from deep blues, lush greens, or crisp whites to craft a mosaic that endures across styles.
Key benefits include:
- Soft reflection of light from the uneven glaze, which illuminates dimmer areas.
- Durable clay composition that withstands humidity in kitchens and bathrooms.
- Geometric motifs inspired by Moroccan riads, providing cultural resonance and layered visuals.
Begin with a test area, like a drawer front or island panel, to perfect your approach and select harmonious colors.
Preparing the Inlay Recess Through Routing
Success in inlay projects hinges on accurate routing. Position tiles about 1/8 inch below the wood surface for a seamless integration that avoids a pasted-on appearance.
Essential Tools and Materials
- Router equipped with depth control.
- Straightedge or guide for templates.
- Tile saw featuring a diamond blade.
- Sandpaper or sanding sponges in progressive grits.
- Vacuum system to manage dust.
Detailed Routing Process
- Outline the design area with painter's tape for clear boundaries.
- Set the router depth to 1/8 inch and verify on scrap wood.
- Guide the router steadily to avoid scorching the wood.
- Arrange tiles in the recess without adhesive to confirm even depth.
- Sand the edges lightly and remove all debris with a vacuum.
This recessing technique safeguards tile edges from damage and yields a polished, level result. Precise cuts also support even grout application.
Test your routing on an extra board first. Multiple practice runs minimize extensive cleanup on the final pieces.
Budgeting for Zellige Inlay Projects
Effective planning aligns costs with project goals. Expenses for Zellige inlays vary by tile quality, existing cabinet state, and desired refinement.
Cost Breakdown per Cabinet Face
- Tiles: $10 to $20 per square foot.
- Thinset mortar and grout: $25 to $50 overall.
- Router bits and related supplies: $30 to $60.
- Sealants and finishing products: $15 to $40.
- Professional tile cutting, if chosen: $100 to $200 per batch.
For an island face spanning 8 to 12 square feet, materials total $150 to $400. A complete kitchen setup might reach $600 to $2,000, scaled to coverage.
To control spending:
- Source factory seconds or assorted colors from authentic Moroccan suppliers.
- Apply inlays selectively to highlight areas rather than entire surfaces.
- Perform routing and sealing in-house, delegating only complex cuts.
Prioritize a reliable sealer. Inferior options degrade fast, compromising the tile shine and inviting water intrusion.
Avoiding Pitfalls in Zellige Installations
Seasoned DIYers encounter specific challenges with Zellige due to its handmade nature.
-
Overlooking variations in tile thickness, which can reach 1/8 inch. Shim or level pieces individually to maintain uniform grout lines.
-
Selecting inappropriate adhesives. Standard formulas weaken in damp environments; opt for ceramic-rated thinset.
-
Neglecting the sealing process. Exposed tiles attract oils and liquids; use two applications of a penetrating sealer for lasting defense.
-
Applying excess grout. Thick lines obscure the defining tile contours; apply sparingly and clean promptly.
-
Disregarding door mechanics. Added thickness may interfere with closing; measure hinge gaps and modify hardware accordingly.
Inspect cabinet movement and fittings prior to installation. Modify stops or hinges to ensure smooth operation.
Personalizing Your Zellige Design
Adapt Zellige inlays to suit your aesthetic by experimenting with patterns and palettes. Traditional star or arabesque motifs lend authenticity, while simplified grids offer modern simplicity. Mix tile colors for subtle gradients or stick to monochromes for understated elegance.
Source tiles from specialty importers to ensure quality. Sketch designs on paper first, scaling them to cabinet dimensions. For added durability, finish surrounding wood with a matching clear coat to unify the look.
This customization transforms a standard project into a personal statement. The result not only beautifies your space but also connects you to a rich tradition of artistry, ensuring your cabinets radiate warmth and invite admiration for years.