DIY Floating Credenzas: Wall Storage Trend Explodes
A floating credenza costs between $250 and $1,200 to build or install, depending on size, materials, and finish. Many homeowners are discovering that wall-mounted furniture instantly opens up space and creates a modern, minimalist look. If your floor feels cluttered or your storage feels dated, this project can transform both style and function in a single weekend.
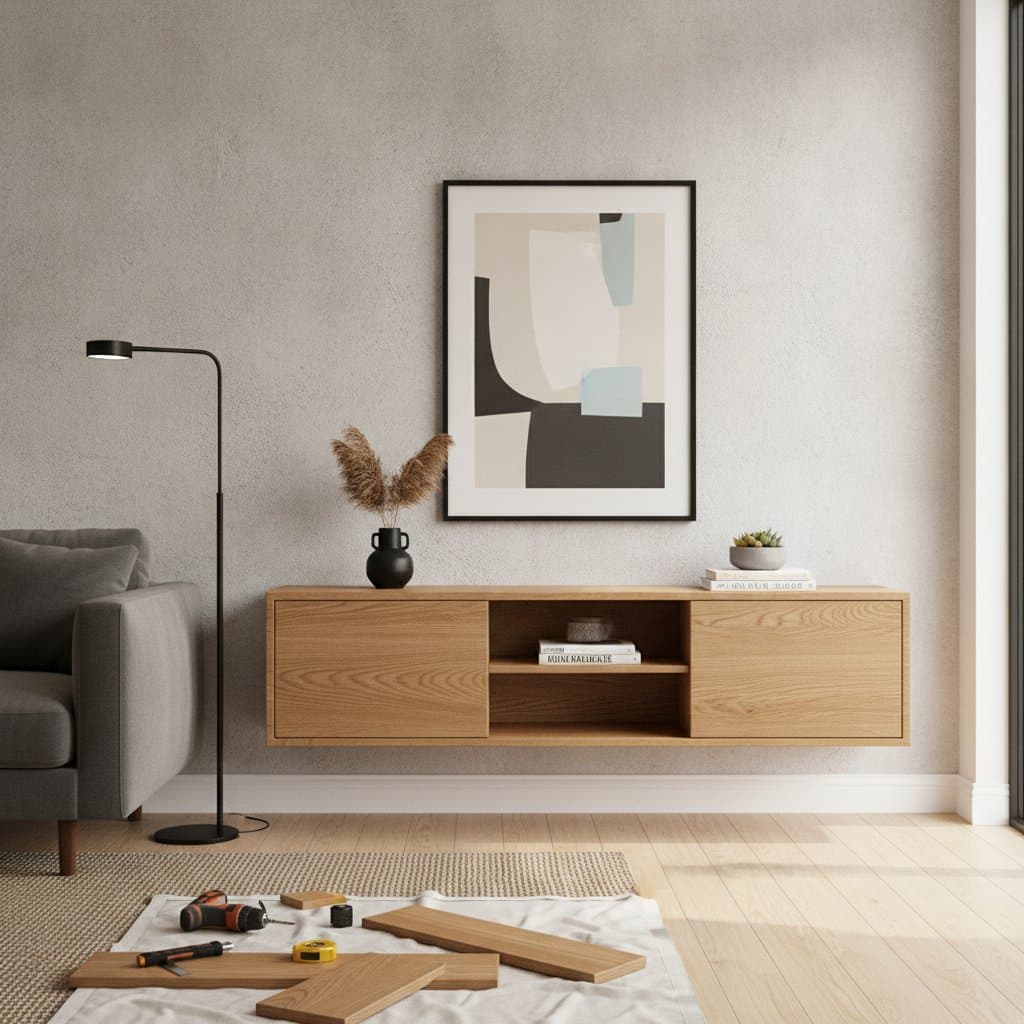
Why Floating Credenzas Are Taking Over
Wall-mounted credenzas used to be a designer luxury, but improved hardware and clear online tutorials have made them accessible to most DIYers. A floating credenza clears valuable floor area, visually lightens a room, and provides concealed storage for electronics, tableware, or office supplies.
For small living rooms, elevating storage by just 12 to 16 inches off the floor can make a space feel larger. In dining areas, the credenza doubles as a serving surface without bulky legs underneath. In offices, it hides cords and routers while maintaining a sleek backdrop for video calls.
Minimalist interiors continue to dominate furniture trends, and a floating credenza fits that aesthetic perfectly. It looks architectural, reduces visual clutter, and adapts to nearly any environment. The best part is that you can make it fit your exact wall length and storage needs.
Start by measuring the wall and sketching a layout that leaves at least 2 to 3 inches of clearance on either side of nearby furniture.
Building the Credenza Box
You can build the cabinet from hardwood plywood with edge banding or from solid wood panels if you prefer a premium look. Plywood remains the better value and is easier to handle for large surfaces.
Basic materials list:
- Two side panels, one top, one bottom, one back panel
- One or two doors or drawers
- Continuous French cleat or heavy-duty metal bracket
- Edge banding or hardwood trim
Cut panels with a circular saw and straightedge guide for clean edges. Assemble using wood glue and pocket screws. Reinforce corners with small cleats inside the box for extra strength. Sand smooth and apply your chosen finish. Satin polyurethane or water-based lacquer keeps surfaces durable without high gloss.
A seamless box design distributes weight evenly across mounting points. It also hides fasteners for a clean, floating appearance.
Dry-fit the box before final assembly to confirm wall clearance and stud alignment.
Costs and Budget
A DIY floating credenza can be budget-friendly or high-end depending on materials.
- Budget build: $250 to $400 using plywood, basic hinges, and paint or stain finish.
- Mid-range: $450 to $750 using birch or oak veneer plywood with soft-close hardware.
- Premium: $900 to $1,200 with walnut veneer, integrated lighting, and custom hardware.
Hiring a professional carpenter costs around $60 to $90 per hour, with total labor between $300 and $600 for installation and finishing.
Money-saving strategies include:
- Use pre-finished plywood to skip multiple coats of finish.
- Buy a ready-made cabinet box and add a custom cleat system.
- Refinish an old credenza by removing the legs and strengthening the back panel for mounting.
Spend on sturdy brackets and quality hinges, since hardware failure can cause serious damage.
Common Mistakes to Avoid
Even experienced DIYers run into trouble with floating furniture. Avoid these costly errors:
- Missing studs. Always confirm stud placement with a small test hole before drilling large fasteners.
- Uneven mounting. Use a long level and measure from multiple points, not just the ends.
- Ignoring wall type. Drywall alone cannot support heavy loads. Always anchor into solid framing.
- Overloading shelves. Keep total stored weight under 40 pounds per linear foot.
- Skipping edge sealing. Unsealed plywood edges absorb moisture and warp over time.
If anything feels loose or unsteady after mounting, remove the piece and re-anchor. Safety should always outweigh convenience.
Maintaining Long-Term Stability
Check mounting hardware every six months for any signs of loosening. Wipe surfaces with a damp cloth and avoid harsh cleaners that could damage the finish. Adjust door hinges as needed to keep alignment precise over time.