Zellige Tiles Bring Moroccan Style to Cabinet Doors
Project Overview
A couple who enjoy handcraft and travel updated their 290 square foot kitchen in Santa Barbara, California. Studio Mesa led the design, and Oak & Grain Workshop built the cabinetry. Photographer Claire Donovan documented the finished space.
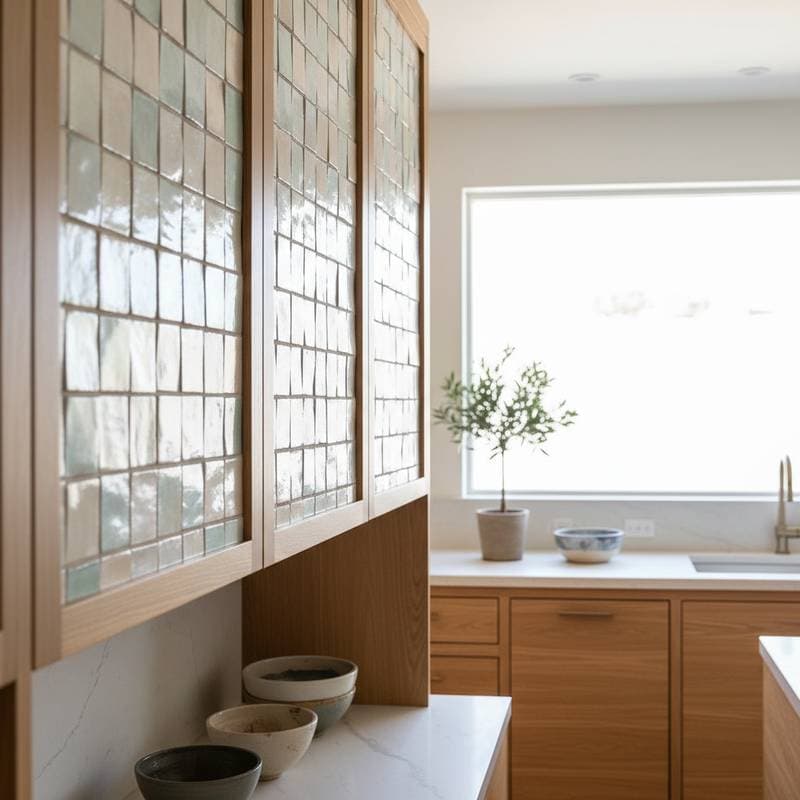
The goal was to introduce warmth and visual interest without crowding the narrow galley layout. The team chose handmade zellige tiles as flush inlays on upper cabinet doors. Each roughly four inch square tile sits inside slim maple frames, creating surfaces that catch and reflect light throughout the day.
Original Condition
The kitchen featured all white slab cabinets and a tight floor plan. Storage felt cramped, and glossy surfaces produced glare under harsh under cabinet lights. Upper cabinets ended short of the ceiling, leaving a dust collecting gap. The entry sightline showed only a flat run of white doors.
Studio Mesa observed that the room had solid structure yet lacked rhythm and depth. The design needed texture and movement while preserving an open feel.
Revised Layout and Finishes
Lower cabinets were rebuilt in white oak with a natural oil finish. Upper doors received zellige tile panels set within maple rails finished in a clear matte coating. The galley widened by ten inches when the refrigerator moved to the far wall. This change lengthened the main prep counter and improved access to the dining area.
Soft LED strips installed above the upper cabinets wash the tile surfaces and emphasize their irregular glaze. The tiles appear in a soft white and sand blend on the doors, while the backsplash uses a contrasting glaze variation for subtle separation.
Additional materials include a honed limestone countertop one and one quarter inches thick and brushed brass pulls spaced four inches on center.
Lighting and Storage Upgrades
LED strips under open shelves operate at 3000K to maintain a warm tone. Two frosted glass globe pendants hang over the island, each ten inches in diameter. Recessed ceiling fixtures are spaced thirty six inches apart for uniform coverage.
Storage improvements include a hidden drawer within a drawer for utensils, pull out tray dividers near the range, and a vertical spice pull out beside the refrigerator. An open shelf above the sink holds ceramics and cookbooks.
Practical Construction Notes
Magnetic tile panels allow removal for future maintenance. The integrated vent hood is clad in matching tile to maintain visual continuity. Corner cabinets received pivot trays for complete access.
Zellige tiles are mounted on lightweight cement board before framing. This assembly accommodates seasonal wood movement and prevents cracking. The high fired matte glaze resists heat and moisture and hides fingerprints more effectively than lacquered paint. Cleaning requires only mild soap and water.
Design Principles That Support the Approach
The framed tile panels introduce handmade variation that softens straight cabinet lines. Fine one eighth inch grout joints keep the field calm while preserving texture. Heavy duty concealed hinges, at least three per tall door, support the added weight.
Raising the upper cabinets to the ceiling and trimming their depth to twelve inches widened the view to the window. Pale tile surfaces reflect daylight deeper into the room. At night, layered lighting creates a gentle gradient from counter to ceiling.
Application Tips for Similar Projects
- Test the effect on one cabinet or pantry door before committing to an entire kitchen.
- Select stable hardwoods such as maple, ash, or oak and seal frames on all sides before tile installation.
- Verify hinge load ratings and test door swing clearance early in the build.
- Use unsanded grout in a neutral tone that blends with the glaze rather than bright white.
- Add a small LED strip above or below the run to highlight surface variation.
- Plan for panel removal during repairs so individual tiles can be replaced without full door disassembly.
Results Reported by the Owners
Morning light shifts the tiles from cream to pale gold. Evening illumination produces a soft, enveloping glow. The homeowners note that the surfaces feel alive because each tile retains visible hand marks. Wood frames will develop patina that contrasts with the stable tile surfaces.
The approach succeeds when tile variation serves as the accent and surrounding finishes remain quiet. Natural materials such as limestone, oak, and linen complete the balance.