
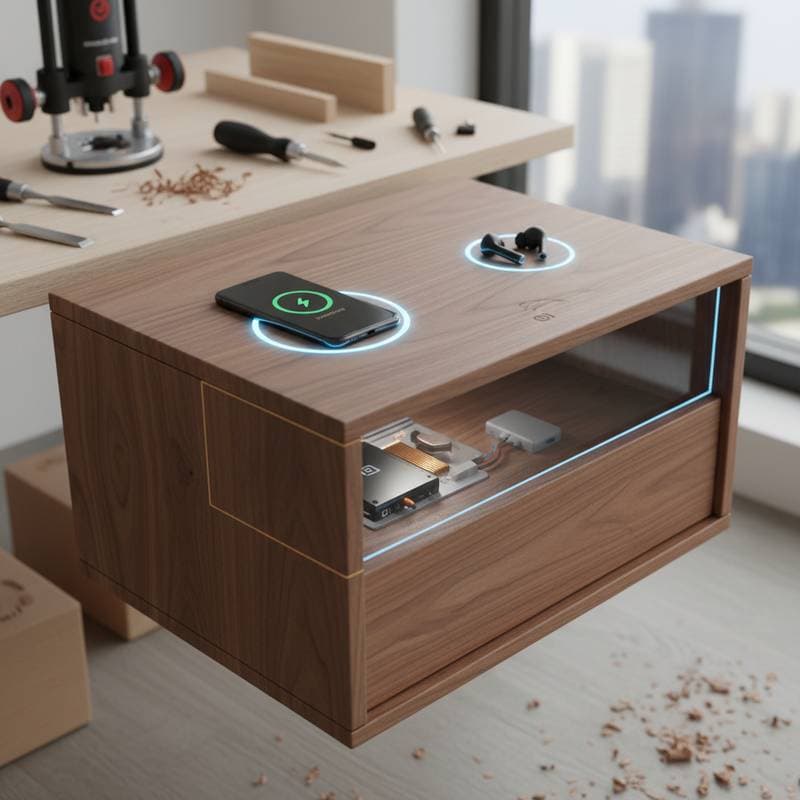
Build Smart Furniture With Built-In Wireless Charging
Your nightstand could charge your phone without a single visible cord. Your coffee table could power your earbuds while you relax. Smart furniture with built-in wireless charging blends function and design in ways that make daily life easier. For woodworkers and DIY builders, it opens new territory where craftsmanship meets technology.
Wireless charging pads now cost as little as $15 to $60. Embedding them into furniture can raise resale or retail value by 20 to 40 percent. The key is learning how to integrate the hardware safely, invisibly, and in harmony with your furniture design.
Why Wireless-Charging Furniture Works
Wireless charging uses inductive coupling. This transfers energy from a coil inside the charger to a matching coil inside a phone or device. The process works through a thin non-metallic surface, usually wood, plastic, or resin. You can hide the charging pad under a tabletop and still charge through up to 8 to 12 millimeters of material, depending on the charger strength.
For small workshops or DIYers, this upgrade remains approachable. You can build a table or retrofit an existing one with minimal wiring. The result feels modern yet relies on simple, low-voltage gear.
Key benefits include:
- No exposed cables to tangle or break
- Cleaner design and easier cleaning
- Safer operation around kids and pets
- Added tech appeal that fits modern interiors
Start by choosing one furniture piece you use daily, such as a nightstand or desk. Plan to embed a Qi-compatible wireless charger beneath the top surface.
Building or Retrofitting the Furniture
You have two pathways. You can build new furniture around the charger or retrofit an existing piece. Both require careful planning of thickness, power routing, and ventilation.
New Build Integration
When starting from scratch, design the top panel to accommodate the charger coil position. Use a router or Forstner bit to recess the charger housing from below. Leave only 2 to 3 millimeters of wood above the coil.
Follow these steps for clean integration:
- Mark the exact charging spot using masking tape.
- Drill a pilot hole, then use a router to create a pocket that fits the charger snugly.
- Leave space for the power cable to run through a hidden channel or leg cavity.
- Mount the charger using screws or epoxy rated for electronics.
- Test before finishing to avoid sealing in a faulty connection.
A small air gap under the charger ensures heat can dissipate naturally. If you apply finish over the charging zone, use thin coats of polyurethane or oil. Avoid metallic pigments that block energy transfer.
Retrofit Installation
Retrofitting lets you upgrade furniture you already love. It works best on tables, desks, or nightstands with solid tops under 1 inch thick.
Complete these steps:
- Locate a spot free of braces or drawer runners.
- Check that the wood in that area is no thicker than your charger rated distance.
- Drill from below and carve a flat-bottom recess until only the allowed thickness remains.
- Secure the charger and route the cord through the back or underside.
A retrofit usually takes three to four hours, depending on finish touch-ups. It provides a fast way to bring older furniture into the smart home era.
Costs and Budget Breakdown
Integrating wireless charging does not require a large investment. You can build a functional, attractive piece on nearly any budget.
Typical cost range falls between $80 and $450. This depends on wood species, charger type, and finish quality.
Budget build example:
- Pine nightstand: $40
- Embedded 10W charger: $35
- Finish and hardware: $25
- Total: $100
Mid-range option:
- Oak or walnut desk: $180
- Long-range 15W charger: $90
- Finish and cable routing parts: $60
- Total: $330
Premium build:
- Custom walnut coffee table: $350
- Dual embedded chargers: $160
- Integrated LED accent lighting: $90
- Total: $600
Material costs vary by region, yet the wireless components remain affordable. Spending more on higher wattage usually pays off in faster charging and better heat control.
Money-saving tips include buying multi-packs of chargers for multiple builds. Use existing wall outlets instead of adding new circuits. Finish surfaces before installing electronics to avoid sanding near wiring.
Common Mistakes and How to Avoid Them
Even skilled makers can run into issues when blending wood and electronics. Watch for these pitfalls.
Overheating during charge often stems from too thick a top or poor ventilation. Thin the area above the coil or cut a small vent underneath.
Misalignment with the device coil occurs when the charger is not centered or shifts while mounting. Use a phone wrapped in painter tape to mark the true charging zone before final install.
Finish interference arises from metallic or epoxy finishes blocking the signal. Keep at least a 2-inch clear zone of plain wood above the coil.
Cable strain results from tight bends or movement in the cord. Add clips or a flexible conduit so the wire hangs freely.
Power mismatch happens with the wrong adapter voltage or cheap cables. Use the adapter included with your charger kit.
Avoiding these common errors prevents frustration and ensures a long-lasting build.
Maintaining Your Investment
Wireless chargers last 20,000 to 30,000 charging cycles on average. That equals many years of daily use. Furniture endures longer than electronics, so plan for easy replacement.
Design your recess so the charger can slide out if it fails. Use screws instead of glue. Mark the underside with the model number and installation date for quick reference.
If your furniture sells commercially, test every unit before delivery. A simple LED charge indicator check ensures quality control and reduces returns.
Future-proof your builds by leaving a little extra space in the recess. Newer chargers may be slightly larger or shaped differently. A 2 to 3 millimeter tolerance ensures compatibility.
Planning Your Next Project
Select your first piece and gather the required tools. Measure twice before cutting. Test the charger placement early. This approach delivers furniture that combines craftsmanship with everyday convenience.