
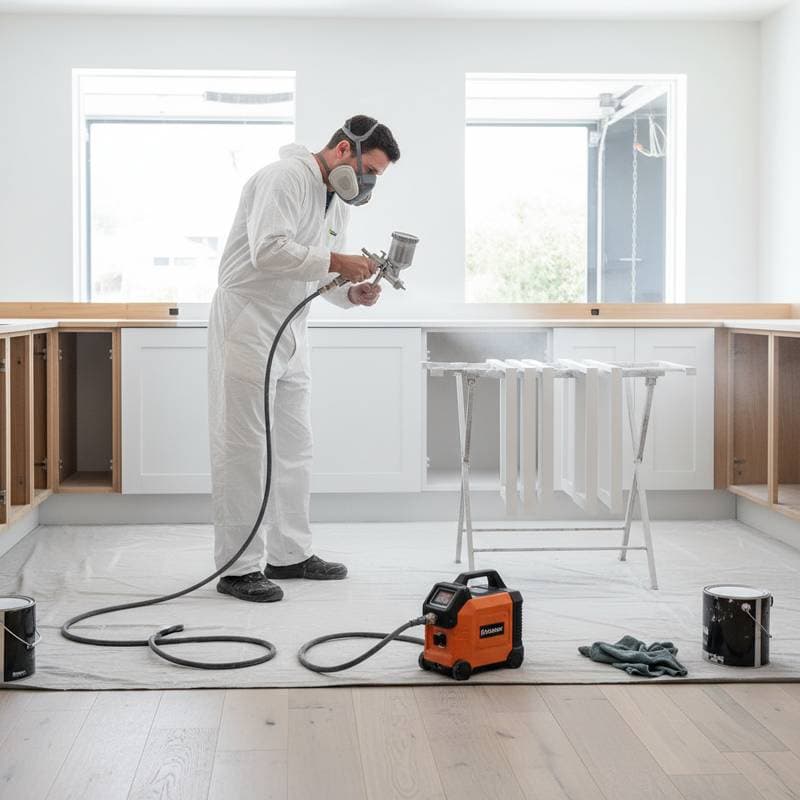
Airless Sprayers Revolutionize DIY Cabinet Refinishing
A tired kitchen can make your entire home feel dated. Hiring a refinisher often costs between $3,000 and $6,500, depending on size and materials. Many homeowners now turn to airless sprayers to obtain professional-quality cabinet finishes for a fraction of that cost. The technology has advanced enough that even first-time users can achieve smooth, factory-like results without visible brush marks.
At a Glance
| Factor | Typical Range | Notes |
|---|---|---|
| Equipment Cost | $250 to $800 | Entry-level to pro-grade airless sprayers |
| Project Duration | 2 to 5 days | Includes cleaning, prep, and multiple coats |
| Paint Use | 20% less than brushing | Even atomization reduces waste |
| Difficulty | Moderate | Requires setup and cleanup practice |
Why Airless Sprayers Are Changing Cabinet Refinishing
Airless sprayers pump paint at high pressure through a small tip, creating a fine mist that coats surfaces evenly. Unlike HVLP sprayers, which rely on air compression, airless systems push paint directly through the hose at pressures up to 3,000 PSI. This produces a more consistent finish on cabinets with detailed profiles or recessed panels.
These sprayers minimize overspray when adjusted correctly, and the finish often rivals what a professional refinisher could achieve in a controlled shop. Users can spray primers, paints, and lacquers without thinning, which saves time and maintains coating integrity.
Why It Works
- High-pressure delivery ensures uniform coverage even on corners and edges.
- No need for thinning keeps paint viscosity consistent, leading to better adhesion and durability.
- Adjustable tips and filters let users match flow rates to cabinet size and paint type.
A well-tuned airless sprayer can reduce total application time by 40 to 60 percent compared with brushing or rolling. The result is a smooth, hard finish that resists fingerprints and moisture.
Your First Step
Start by practicing on scrap boards before moving to cabinets. Once users learn how to control the spray fan and overlap patterns, the process becomes surprisingly intuitive.
Step-by-Step: Refinishing Cabinets with an Airless Sprayer
1. Prep and Clean
Remove doors, drawer fronts, and hardware. Label each piece to avoid confusion later. Degrease every surface with a TSP-based cleaner or a degreasing detergent. Residue can cause paint to peel.
Sand lightly with 220-grit paper to dull the sheen. Vacuum dust thoroughly, then wipe with a tack cloth. Cover floors, countertops, and nearby walls with plastic sheeting.
2. Prime Properly
Use a bonding primer made for wood cabinetry. Apply one light coat using the sprayer at around 1,200 to 1,500 PSI, then let it dry. Lightly sand again to knock down raised grain.
3. Spray the Finish Coats
Most DIY users choose a waterborne enamel or acrylic alkyd hybrid. These paints cure hard like oil but clean up with water. Set the sprayer to 1,600 to 2,000 PSI and use a 311 or 313 tip for cabinet doors. Two thin coats usually provide full coverage.
4. Curing and Reassembly
Allow the final coat to cure for at least 24 to 48 hours before reinstalling hardware. Handle pieces carefully to avoid impressions in the fresh finish. Reattach doors and drawers, then admire the transformation.
Costs and Budget Planning
Airless sprayers range widely in price and capability. For most cabinet refinishing projects, expect to spend:
- $250 to $400 for homeowner-grade models
- $500 to $800 for professional-level units with stainless steel pumps and longer hoses
- $40 to $60 for replacement tips or filters
Paint and primer add another $150 to $300, depending on kitchen size. Compared with professional refinishing costs, users can save over $2,000, even after buying a quality sprayer.
Where to Spend and Where to Save
Spend more on a reliable pump and quality tip set. These parts directly affect finish quality. Save on accessories like extension poles or large hoppers unless planning to tackle multiple projects.
Hidden Costs
Do not overlook disposable filters, masking materials, and protective gear. Budget $50 to $100 for gloves, respirators, and plastic sheeting.
DIY or Professional Help
When DIY Makes Sense
If comfortable with basic tools and patient during prep, refinishing with an airless sprayer is achievable. The job suits homeowners who can dedicate a few days to careful setup and cleanup. The learning curve is short once understanding how to maintain consistent spray distance and overlap.
When to Hire a Pro
Hire a professional if cabinets have extensive damage, veneer peeling, or moisture issues. A contractor with shop-grade spray booths can control dust and humidity perfectly. Expect a $4,000 to $7,000 price tag for a full professional refinishing with sprayed enamel.
How to Vet Contractors
- Ask if they use airless or HVLP equipment.
- Request a sample door or test panel.
- Confirm they use low-VOC or waterborne finishes.
- Check insurance and local licensing.
Common Mistakes and How to Avoid Them
Even experienced DIYers can run into problems. Here are the most frequent issues:
- Skipping prep. Paint will not bond to grease or glossy surfaces. Always clean and sand thoroughly.
- Spraying too close. Keep the tip about 10 to 12 inches from the surface to prevent runs.
- Ignoring pressure settings. Too much pressure causes overspray, while too little causes spitting. Adjust gradually while testing on cardboard.
- Neglecting filters. A clogged filter leads to uneven spray patterns. Clean after every use.
- Rushing reassembly. Let paint cure fully before reinstalling doors. Fingerprints can imprint permanently on soft finishes.
Quick Fixes
If noticing drips, let them dry completely, sand them smooth, and respray lightly. For uneven sheen, apply a final mist coat at a consistent distance.
Maintaining Your Investment
Once cabinets look new again, keep them that way with gentle care. Wipe spills promptly and avoid harsh chemical cleaners.
If planning to resell the home, a fresh cabinet finish can raise kitchen appeal immediately. Real estate agents often say that a clean, uniform cabinet finish helps buyers feel the space is move-in ready.
Next Steps for Your Project
- Compare airless sprayer models and read user reviews focused on cabinet projects.
- Test the sprayer with primer before applying finish coats.
- Plan one weekend for prep and priming, and another for finish coats and curing.
- Keep leftover paint labeled with color codes for future touch-ups.
Airless sprayers have made cabinet refinishing more accessible than ever. With patience and a clean workspace, users can give the kitchen or bath a professional-grade finish for a fraction of the price.
Resources and Visual Aids
- Diagram: Typical spray pattern for cabinet doors (alt text: Airless sprayer fan pattern showing 50 percent overlap for even coverage).
- Reference Chart: Common tip sizes and compatible coatings (alt text: Table listing airless sprayer tip numbers for primer and enamel use).