Floating Vanities: The Rise of DIY Built-Ins in Bathroom Design
Floating vanities represent a significant evolution in bathroom aesthetics and functionality. These wall-mounted units elevate cabinetry above the floor, creating a shadow line that enhances visual openness and accessibility. Homeowners who construct their own versions achieve precise control over dimensions, storage solutions, and surface treatments, all while maintaining budget constraints.
Project Overview
Target Audience: Homeowners renovating primary or guest bathrooms
Setting: Urban apartments and suburban homes
Room Dimensions: Standard bathrooms measure 60 to 120 square feet, or 5.5 to 11.1 square meters
Contributors: Independent designers, DIY enthusiasts, and contributing photographers
Challenges of Traditional Setups
Conventional floor-standing vanities dominate older bathrooms, occupying space from the tiled floor to the wall surface. These units typically feature cramped drawers, inadequate illumination, and limited clearance around the countertop. Plumbing constraints often override ergonomic needs, leading to inefficient layouts. One homeowner described their previous setup as a solid obstruction that stifled the room's potential. Issues like water damage in the base area and restricted airflow complicated routine maintenance.
Benefits of the Floating Transformation
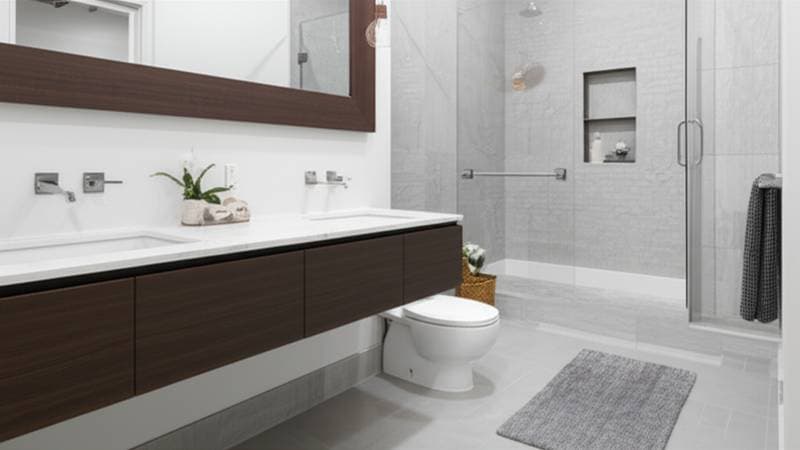
Transitioning to floating vanities addresses multiple design flaws simultaneously. Positioning the cabinetry 10 to 12 inches, or 25 to 30 centimeters, above the floor expands the apparent floor space and permits light to circulate freely. Built-in drawers or exposed shelving supplant deep, shadowy interiors. Photographs of completed projects reveal sleek, wall-hung designs with slab-style fronts in materials such as white oak or walnut veneer. Under-cabinet LED lighting provides a subtle illumination that serves as a convenient nighttime guide.
Beyond aesthetics, these vanities streamline everyday tasks. The exposed under-space facilitates straightforward floor cleaning and reduces moisture accumulation. Sturdy wall brackets or cleats ensure stable weight distribution, imparting a sense of permanence. A professional remodeler noted that this elevated gap dramatically altered the room's proportions, making it appear significantly broader.
Essential Design Specifications
- Installation Height: Position the countertop 30 to 34 inches, or 76 to 86 centimeters, from the floor to optimize user ergonomics.
- Projection: Limit depth to 18 to 22 inches, or 46 to 56 centimeters, to preserve movement in smaller areas.
- Construction Materials: Form the core from plywood with hardwood framing or solid plywood fronts, protected by a marine-grade sealant.
- Fittings: Incorporate soft-close undermount drawer slides, push-to-open doors, and subtle handles or integrated pulls.
- Illumination Options: Install damp-rated LED tape beneath the unit, complemented by wall sconces or ceiling recesses.
- Fixture Integration: Select wall- or deck-mounted faucets that hide supply lines within the structure.
These elements amplify the airy illusion and demonstrate meticulous execution. Finished installations exhibit seamless joints, uniform lighting from below, and uninterrupted wall tiling that extends behind the vanity.
The Appeal of DIY Construction
Enthusiastic woodworkers and skilled homeowners favor building floating vanities for their accessible yet rewarding process. The basic rectangular form invites familiarity, while securing a level mount introduces technical skill. Ready-made options demand high prices, often exceeding thousands of dollars, whereas a tailored plywood assembly costs 250 to 800 dollars in supplies, varying by accents and components. This approach balances innovation with utility.
Tools and Resources for Success
Advancements in equipment, including compact routers, pocket-hole jigs, and French cleat mechanisms, simplify secure wall attachments. Digital tutorials outline procedures for stud reinforcement and bracket alignment. Crafters adapt dimensions or embed electrical outlets within storage compartments. In workshops, these pieces suit efficient use of remnant veneers for limited production runs.
Enhanced Maintenance and Flow
The absence of supporting legs or base moldings maintains a seamless floor plane. Tiling extends without interruption, broadening the visual width of confined spaces. Maintenance requires minimal effort, as accessible edges prevent debris buildup. In moisture-prone regions, improved ventilation safeguards against mold and preserves material integrity.
Aesthetic Versatility and Harmony
These vanities align with contemporary minimalism yet complement classic environments. A neutral wall color or vertical wood grain introduces texture. The suspended profile fosters balanced tranquility, maximizing light distribution. Professionals frequently match them with mirrors reaching from ceiling to counter, amplifying reflections of both surfaces.
Practical Implementation Steps
- Assess Structural Support: Reinforce walls with blocking between studs or employ anchors supporting at least 200 pounds, or 90 kilograms.
- Determine Elevation: Account for sink depth and personal reach when positioning supports.
- Coordinate Utilities: Align wall-based pipes and drains with cabinet cutouts to conceal modifications.
- Apply Protective Coatings: Shield all internal areas with polyurethane or conversion varnish against humidity.
- Integrate Lighting Layers: Blend focused task lights, general illumination, and subtle accents to emphasize the design.
Following these guidelines produces a durable, expert-quality result suited to regular demands.
Case Studies from Actual Renovations
In a modest apartment bathroom, a 42-inch, or 107-centimeter, white oak floating unit supplanted an oversized double-door cabinet. It incorporated four divided maple-lined drawers for organized storage. The designer aimed to maximize utility in the limited area. This change exposed an additional 8 inches, or 20 centimeters, of flooring, invigorating the overall brightness.
A separate project featured a painted MDF vanity topped with solid-surface material and a built-in trough basin. The surrounding tile formed an unbroken backsplash. Under-unit and mirror-integrated LEDs delivered sophisticated, multi-level lighting. The resident appreciated how it promoted a more relaxed morning routine.
Workshop Strategies for Woodworkers
Floating vanities strike an ideal balance for cabinet makers, blending joinery techniques with furniture principles. They require accurate assembly, resilient coatings, and reliable fixtures, but their scale fits modest operations. Experiment with edge treatments, wood orientations, or hues on a contained basis, distinct from extensive kitchen undertakings. Established builders showcase these as demonstrations of bespoke superiority over mass-produced alternatives.
Everyday Impact of the Installation
After fitting, the vanity reshapes room navigation. Light bounces across surfaces, the flooring appears unified, and upkeep becomes intuitive. This design choice reflects intentional craftsmanship and thoughtful living.