Introduction to Floating Nightstands
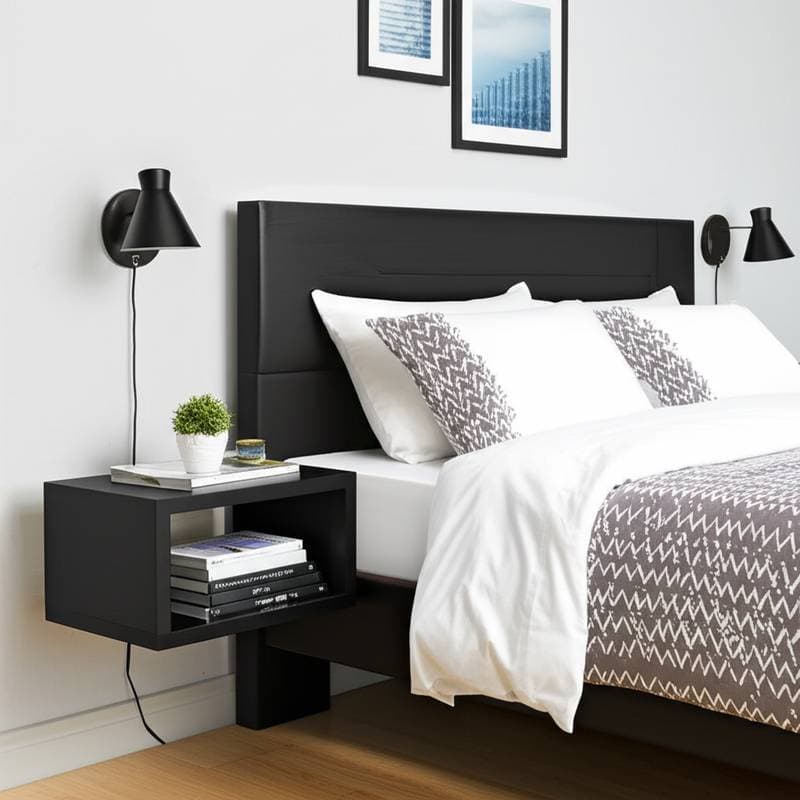
Floating nightstands offer a practical solution for small bedrooms. These wall-mounted designs free up floor space, facilitate easier cleaning beneath, and introduce a sleek, modern aesthetic. This guide details the construction of a durable floating nightstand capable of supporting 40 pounds, suitable for lamps, books, or personal items. The project requires intermediate woodworking skills and basic tools, with completion possible over a weekend.
Customization options allow adaptation to various styles, from minimalist to rustic. Select materials and hardware based on desired appearance and budget. The result provides enhanced functionality while complementing minimalist or compact living spaces.
Required Tools
Gather these essential tools before starting the project:
- Stud finder and level
- Drill with driver bits
- Circular saw or miter saw
- Clamps and measuring tape
- Sandpaper or sanding block (various grits from 120 to 220)
- Safety gear, including goggles and dust mask
These tools ensure precise cuts, secure assembly, and safe installation. A workbench or stable surface aids in accurate measurements and assembly.
Materials List
Prepare the following materials for one nightstand, assuming dimensions of 18 inches wide by 12 inches deep by 6 inches high:
- 3/4-inch plywood or hardwood board (1 x 24 x 18 inches for the top shelf)
- 3/4-inch plywood (1 x 12 x 18 inches for side panels and drawer front, if adding a drawer)
- 1/2-inch plywood (1 x 12 x 16 inches for drawer bottom)
- Wood screws (1-1/4 inch and 2-inch, assorted quantities)
- Wood glue
- Finishing supplies: stain, oil, or paint, plus brushes or rags
- Mounting hardware: concealed brackets or L-brackets rated for 40 pounds or more
- Optional: drawer slides (pair rated for 20 pounds) and knob or pull
Quantities may vary with design choices. Verify hardware load ratings to guarantee stability.
Step-by-Step Construction
Follow these steps to assemble the nightstand. Work in a well-ventilated area and measure twice before cutting.
1. Prepare the Components
Cut the top shelf to 18 by 12 inches using the circular or miter saw. For side panels, cut two pieces to 6 by 12 inches. If incorporating a drawer, cut the drawer box to 16 by 10 by 5 inches, with the front panel at 18 by 6 inches to overlap slightly.
Sand all edges smooth, starting with 120-grit paper and progressing to 220-grit for a refined finish. This step prevents splinters and ensures even application of finish later.
2. Assemble the Box Frame
Apply wood glue along the edges of the side panels and attach them to the underside of the top shelf, forming a U-shape. Position the sides flush with the front edge and 1 inch inset from the back for mounting clearance.
Secure with 1-1/4-inch wood screws, drilling pilot holes to avoid splitting. Clamp pieces together and allow glue to dry for at least one hour. For added strength, reinforce joints with corner braces inside the frame.
3. Add the Drawer (Optional)
If desired, construct the drawer by attaching the sides to the front and back panels with glue and screws. Fit the bottom panel into grooves or attach directly with glue and brads.
Install drawer slides according to manufacturer instructions, ensuring level alignment within the frame. Attach the drawer front last, using screws from inside the drawer box.
4. Apply Finish
Choose a finish that matches room decor. For a natural look, apply a hand-rubbed oil; for protection, use polyurethane. Stain first if altering wood color, then seal with multiple thin coats.
Allow each coat to dry fully, sanding lightly between applications. This process enhances durability and elevates the piece to furniture quality.
Mounting the Nightstand
Proper installation ensures the nightstand supports 40 pounds without sagging. Locate wall studs using the stud finder for secure anchoring.
Bracket Selection and Placement
For a minimalist appearance, select concealed floating shelf brackets rated for at least 40 pounds. Position them 2 inches from the back edge of the shelf and centered along the width.
For rustic style, use visible steel L-brackets finished in matte black, attaching two per side. Mark positions with a level, using painter's tape to outline for precision.
Installation Steps
- Drill pilot holes into the wall at stud centers, using a level to ensure straight alignment.
- Secure brackets to studs with 2-inch lag screws.
- Slide or lift the nightstand onto the brackets, verifying stability.
- Test load gradually, starting with 10 pounds and increasing to confirm secure hold.
Mount at a height of 24 to 30 inches from the floor, adjustable based on bed height.
Costs and Budget Choices
Total cost ranges from $45 to $120 per nightstand, influenced by material and hardware selections.
Budget Option: Opt for pine or plywood with a simple stain and visible brackets. This approach keeps expenses near $45.
Midrange Option: Select oak or maple paired with concealed brackets. Expect costs around $90.
Premium Option: Use walnut or cherry wood, incorporating soft-close drawer slides and a hand-rubbed oil finish. Prices may exceed $120.
Invest in quality hardware to maintain stability over time. Inferior brackets risk wall damage from flexing or pulling out. An additional $10 on robust hardware yields long-term savings.
Budget Tip: Repurpose leftover hardwood flooring or countertop scraps for the top panel. These often provide thickness and finish comparable to new premium materials.
Common Mistakes and How to Avoid Them
Overlooking stud locations leads to unstable mounting. Always use a stud finder and verify with a small test screw.
Inaccurate measurements result in uneven shelves. Double-check dimensions and employ a level at every stage.
Insufficient support causes sagging. Choose hardware exceeding the 40-pound requirement and distribute weight evenly during use.
Rushing the finishing process invites uneven coverage. Apply thin coats and allow proper drying time between layers.
Neglecting safety gear exposes users to dust and injury. Wear goggles, masks, and gloves throughout construction.
Pro Tips for Success
Test bracket positions with painter's tape prior to drilling to visualize the final placement.
Incorporate concealed cord channels or drill a rear hole to manage charger cables neatly.
Match the finish to existing room trim for seamless integration.
Maintain a slight gap between the wall and any back panel to promote air circulation and simplify dusting.
Consider adding a cordless charging pad under the surface for modern convenience, ensuring ventilation.
Enhancing Bedroom Functionality
This floating nightstand not only conserves space but also streamlines daily routines. Easy access to essentials reduces clutter on the floor, while the sturdy design accommodates heavier items securely. Customize further with integrated lighting or additional shelves to suit specific needs. The completed project delivers lasting value, blending practicality with aesthetic appeal in compact living environments.