Discover DIY Wood Slat Ceilings: 2026's Acoustic Trend
Imagine entering a space where conversations flow clearly without harsh reverberations, and the overhead design evokes the refined elegance of a high-end boutique. Wood slat ceilings deliver this precise balance of form and function. As a manageable DIY endeavor, such a project requires careful preparation and can transform a room over a single weekend, providing enduring acoustic and visual advantages.
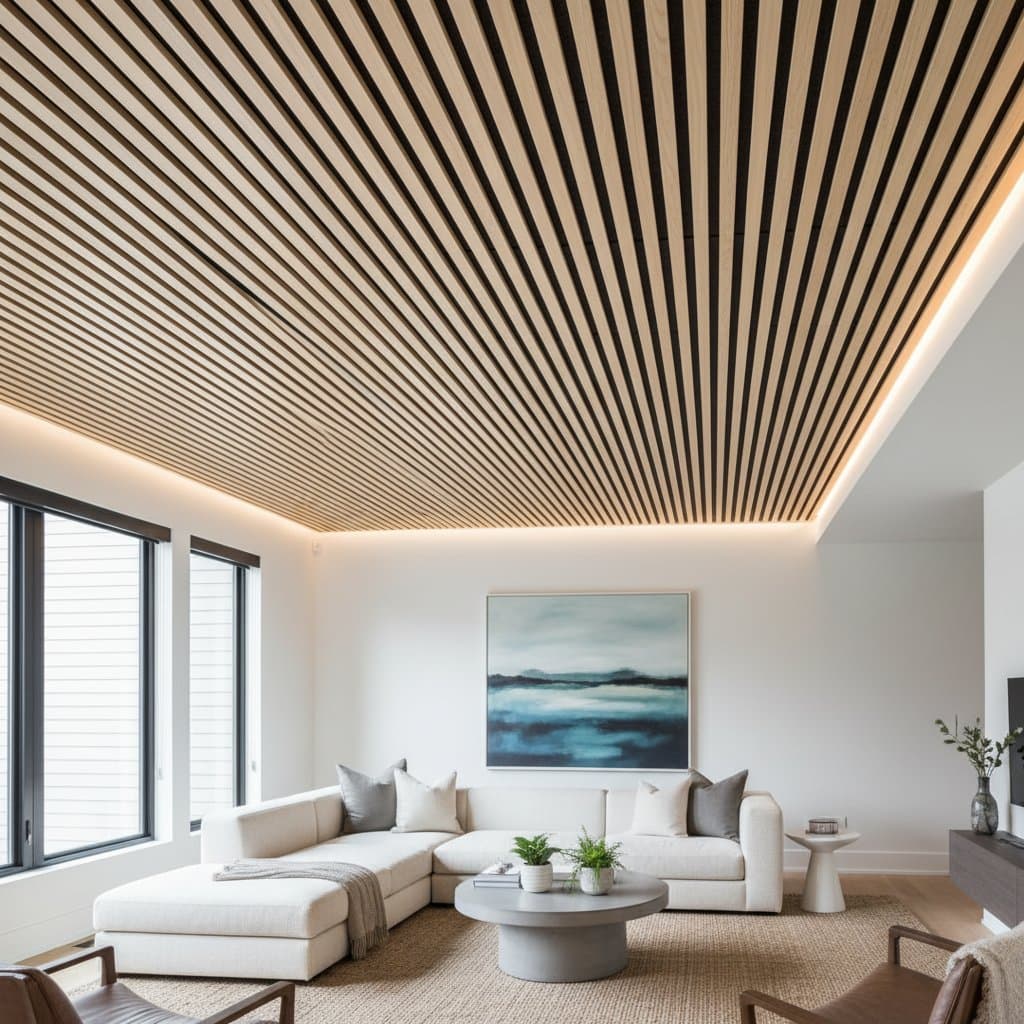
Why Wood Slat Ceilings Are Trending
Contemporary open layouts often feature hard flooring, walls, and furnishings that amplify sound reflections, leading to persistent echoes. Wood slat ceilings address this issue by diffusing sound waves rather than allowing them to rebound. The individual slats interrupt noise paths, and an underlying soft material traps and disperses remaining vibrations, fostering a serene atmosphere.
Interior designers and construction professionals increasingly specify these ceilings for residential and commercial applications. The linear arrangement of slats introduces visual rhythm and dimension, elevating a typically utilitarian ceiling into a focal point. These elements adapt seamlessly to diverse aesthetics, ranging from sleek mid-century modern to cozy farmhouse motifs. Options include applying stains for depth, paints for uniformity, natural finishes for authenticity, or layered colors for subtle interest.
The effectiveness stems from the intentional gaps between slats, paired with acoustic backing such as mineral wool or dense felt. Independent testing reveals sound absorption coefficients of up to 0.75 across mid-range frequencies, indicating that the surface captures approximately 75 percent of incident sound energy.
To evaluate your space, proceed room by room and produce a sharp clap. Persistent ringing suggests that a slat ceiling installation would yield noticeable improvements in clarity and comfort.
Essential Materials and Cost Considerations
Selecting quality components ensures longevity and performance. Core materials include furring strips (1x2-inch pine or cedar, approximately $1.50 per linear foot), acoustic backing (blackout felt or 1-inch mineral wool panels, $2 to $4 per square foot), and slats (1x4-inch hardwood like oak or walnut, $3 to $6 per linear foot). Additional supplies encompass wood screws (2-inch galvanized, $0.10 each), staple gun with 3/8-inch staples, chalk line, level, and finishing trim (quarter-round molding, $1 per linear foot).
Total material expenses range from $8 to $14 per square foot, depending on wood species and backing type. For a 200-square-foot room, anticipate $1,600 to $2,800 in costs, excluding tools. Factor in 10 percent extra for waste and cuts. Sustainable choices, such as FSC-certified woods, add minimal cost but enhance environmental appeal.
Step-by-Step Installation Guide
Proper execution demands precision to achieve uniform results. Begin with measurements to confirm joist spacing, typically 16 or 24 inches on center.
-
Plan the layout. Snap chalk lines across the ceiling to indicate furring strip positions, aligning with joist centers for secure attachment.
-
Secure furring strips. Position 1x2 strips perpendicular to joists and fasten with 2-inch wood screws every 12 inches. Ensure strips remain level using shims if the existing ceiling varies.
-
Apply acoustic backing. Unroll and attach felt or mineral wool to the strips via staples or screws, overlapping edges by 1 inch to eliminate gaps. Cut around any fixtures with a utility knife.
-
Install the slats. Commence from one wall, affixing slats parallel to the room's length and perpendicular to furring strips. Maintain 0.75-inch gaps using spacers like washers or custom jigs; secure with finish nails or screws from below.
-
Verify alignment throughout. Advance in 4-foot sections, checking with a laser level or string line after every third slat to prevent drift.
-
Complete the edges. Install trim molding along perimeter junctions with walls, caulking seams for seamless integration. Sand and finish slats as desired before mounting.
This configuration permits sound to penetrate the slats and dissipate within the backing, substantially reducing reverberation times from over 0.5 seconds to under 0.2 seconds in typical rooms.
During installation, assess progress by introducing audio sources beneath completed areas. Observe reductions in echo for adjustments before full commitment.
Deciding Between DIY and Professional Help
Individuals proficient with power tools and working at heights can complete this project independently. Challenges primarily involve consistent gap maintenance and handling longer slats without assistance.
Opt for DIY when the area measures less than 250 square feet, a second person assists with positioning, and standard tools like a drill, saw, and ladder are available.
Engage professionals for ceilings with irregular geometries, integrated lighting, or requirements for electrical modifications and fire-resistant assemblies. Professionals also provide assurances through warranties and adherence to standards like ASTM C423 for acoustic verification.
When selecting a contractor, request proof of licensing, insurance coverage, and examples of comparable installations. Inquire about their experience with sound-rated materials to ensure compliance and optimal outcomes.
Maximizing Benefits Post-Installation
Upon completion, rooms exhibit immediate enhancements in auditory warmth and reduced noise fatigue. Select durable woods such as quartersawn oak for stability or aromatic cedar for natural insect resistance, allowing for tonal variations that enrich the visual texture.
Plan for one to three days of focused effort, depending on room size and complexity. Regular maintenance involves dusting slats annually and inspecting backing integrity every few years. These ceilings not only refine acoustics but also contribute to property appreciation by aligning with current biophilic design preferences.
For inspiration, consider integrating slats with ambient lighting to accentuate grain patterns, creating dynamic shadows that evolve with natural light.